VSAN 6.2 Disk Format Upgrade Fails

error_image I’ve been doing quite a bit of VSAN deployments and upgrades lately. When upgrading up to version 6.1, I did not encounter any issues, luckily. Upgrading VSAN cluster (vSphere) to 6.2 also very smooth; however, while upgrading the disk format from version 2 or 2.5 to version 3, I’ve encountered a few errors. Here are some of the errors I came across.

The first issue was related to inaccessible objects in VSAN.

Cannot upgrade the cluster. Object(s) xxxxx are inaccessible in Virtual SAN.

VSAN_Inaccessible_Obj

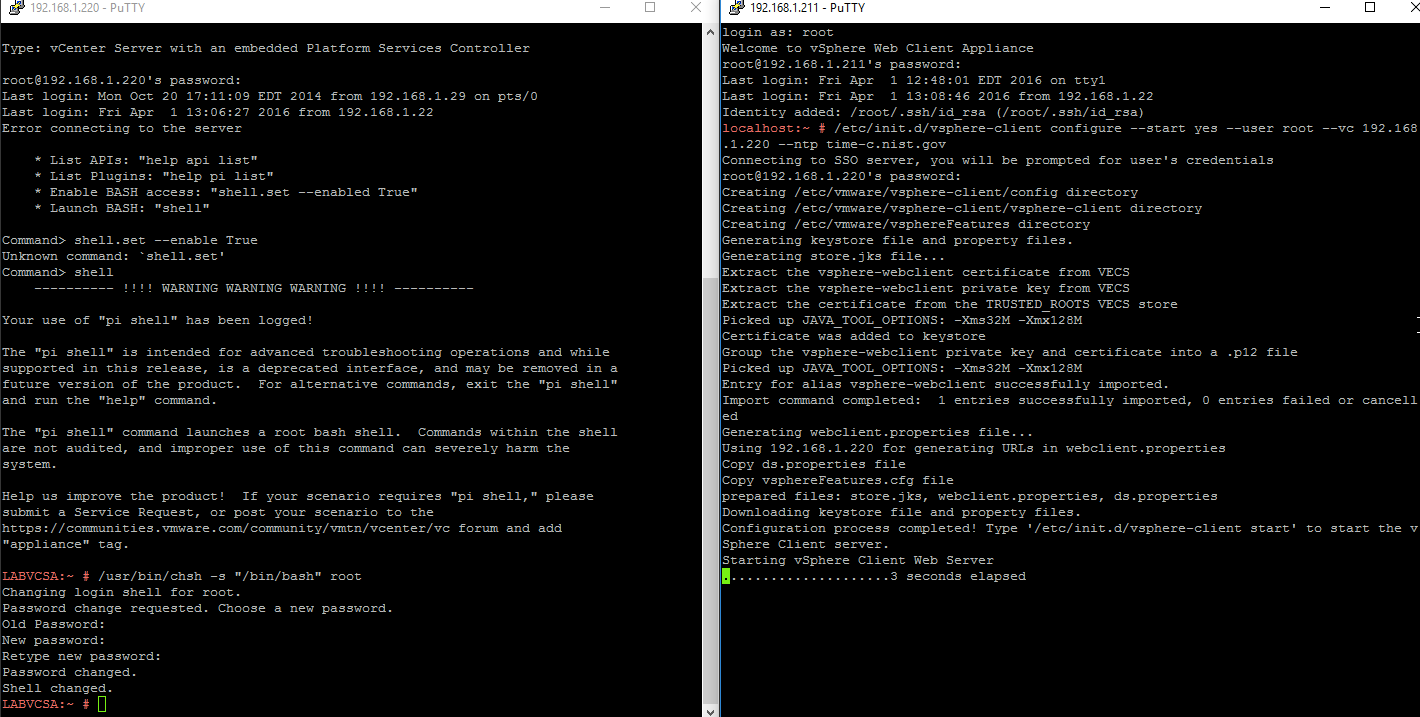
This is actually not a new issue.  These inaccessible objects are stranded vswap files that need to be removed. In order to correct this issue, you will need to connect to your vCenter using RVC tools. The RVC command to run is: vsan.purge_inaccessible_vswp_objects 

VSAN_purge_inaccessible


The second issue I ran into was related to failed object realignment. Error:

Failed to realign following Virtual SAN objects…. due to being locked or lack of vmdk descriptor file, which requires manual fix.

VMware has acknowledged the issue and has created a python script to correct this issue. The script and instructions can be found on KB2144881

The script needs to be run from the ESXi host shell with the command below, after you have copied the script to a datastore that the host has access to. The script name is VsanRealign.py, but if you rename the file, you will obviously need to use the correct name instead. NOTE: The script takes quite a while to run, so just let it go until it finishes.

python VsanRealign.py precheck

VSAN_realign

Here the script takes care of the descriptor file issue once you answer yes. In this case, the object is not a disk and is missing a descriptor file is removed permanently, since it is a vswap file. If the vswap file is actually associated to a vm, the vm will keep working normally (unless you are swapping, which then you have bigger problems). The vswap file will be recreated once you reboot the vm.

Ok, so time to move. Ready to upgrade…. Maybe not. Ran into another issue after running the same script with precheck option. In this case, the issue was related to disks stuck with CBT (Change Block Tracking) objects. To fix this, simply run the same script but use the fixcbt option instead of the precheck option.

python VsanRealign.py fixcbt


VSAN_fixcbt

VSAN_fixcbt2


So at this point, everything looked healthy and ready to go. However; when I tried to do the disk format upgrade yet again, it gave me another error. So this was the fourth error during the upgrade process, luckily this was an easy fix and may not apply to all VSAN environments.

I ran into this with 2 small environments of 3 hosts each. The error stated that I could not upgrade the disk format because there were not enough resources to do so.

A general system error occurred: Failed to evacuate data for disk uuid <XXXX> with error: Out of resources to complete the operation 

To be able to upgrade the disk format to V3, you will need to run the upgrade command from RVC using the option to allow reduced redundancy.

Log in to RVC and run the following command: vsan.ondisk_upgrade –allow-reduced-redundancy

VSAN_Ondisk_Upgrade


Each host removes the VSAN disk group(s) from each host and re-adds them on the new format. DO NOT try to do this manually as you will have mismatches that VSAN can’t function properly under. Please follow the recommended procedures.

These steps allowed to upgrade VSAN disk format to V3. It did take quite a while to do this (12 hours), but this was due to me testing all these steps on my lab prior to doing it in production. Yes, the lab had some of the same issues.

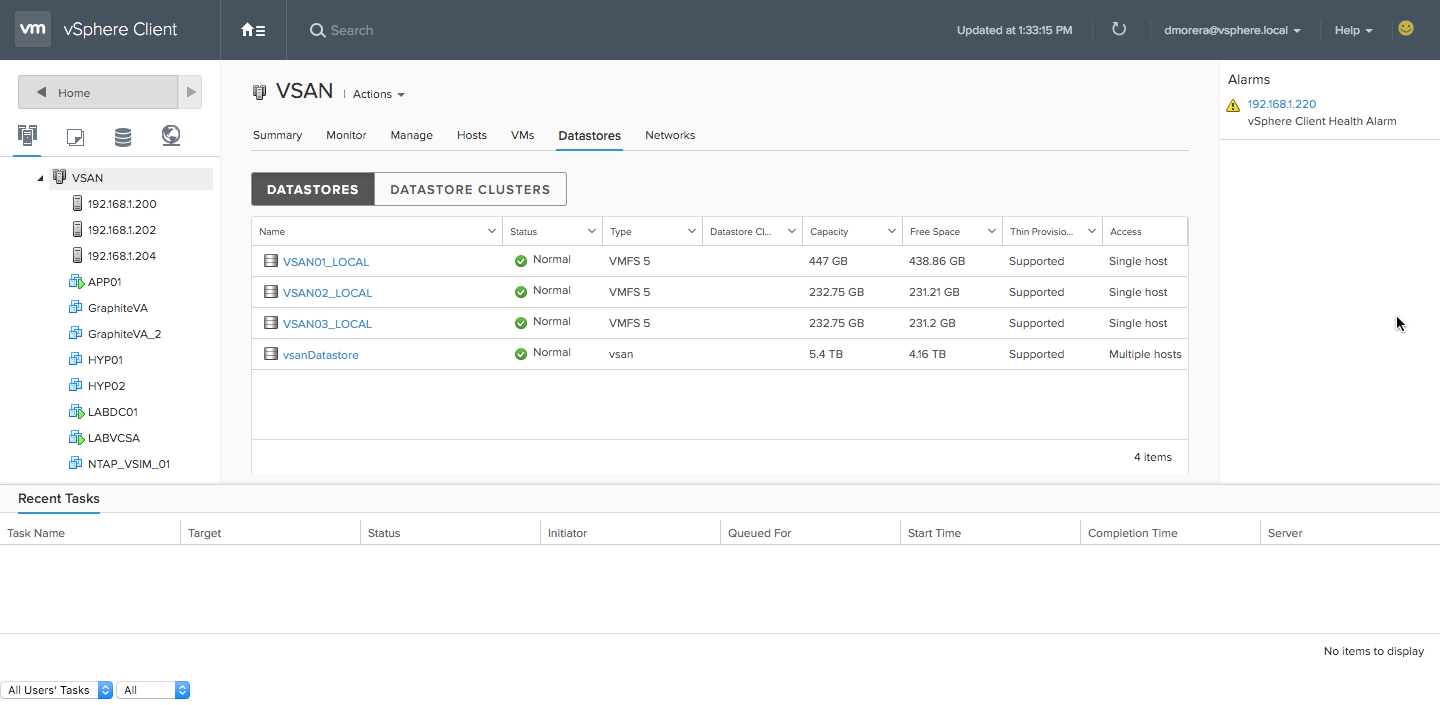
After the upgrade was done, I checked the health of the VSAN cluster and noticed a new warning. This warning indicated the need to do a rebalance. So manually running a rebalance job solves the issue.

All good after that…


SIDE NOTE:

I did the proper troubleshooting to find out the root cause. The main issue was related to a firmware bug that was causing the servers to not recognize the SD card where vSphere was installed on, and eventually crash. The many crashes across all hosts caused all these object issues within VSAN.

Such issue was related to the iLO version of HP380 G9 servers, running iLO version 2.20 at the time. The fix was to upgrade the iLO to version 2.40 (December 2015) which was the latest version.


HTML 5 – vSphere and ESXi Host Web Clients

H5The wait is over (almost). Since the introduction of vSphere Web Client, many admins have slowed down the adoption of the Web Client as well as updates to vSphere due to the performance of said client.

VMware has released a couple of flings in relation to this problem. One of them was the host web client, where you can manage your hosts directly without the need to install the vSphere client. This fling is now part of the latest update to vSphere 6.0 U2. A few days ago, VMware released a similar option for vCenter. Both of these options are based on HTML 5 and javascript.

Host Web Client

Like I mentioned before, starting with vSphere 6.0 U2, the host web client is already embedded into vSphere. If you do not have this update you can still download the OVA and access the host web client that way. Currently it only works if you have vSphere 6.0+ but once version 5.5 U3 is released, it will also work with that version. Here is a link to download the fling.

To access the web client, you will need to add “/ui” at the end of the name/ip address of your host. For example https://<host-name-or-IP>/ui

The client is very responsive and has a nice UI. Not all the features are currently supported, but more will be coming at some point in the near future.

host_ui


vCenter Web Client

This HTML web client is only available as a fling at the moment. You will need to deploy an OVA and register the appliance with the vCenter that you would like to manage. Being a fling, not all features are included. It basically focuses on VM management, but I am sure they are working to port all the features over at some point (I hope).

To deploy this ova, you will need to enable SSH and Bash Shell on your VCSA. You can do both from the VCSA web UI. If you are running Windows based vCenter refer to the Fling documentation here.

vcsa_uI-shell

Prior to going through the configuration you will need to

  1. Create an IP Pool (If deploying via C# Client)
    • Note: I deployed using Web Client and didn’t create the IP Pool for me automatically as it is supposed to, so double check you have an IP Pool before powering on the appliance
  2. Deploy the OVA

IP_Pool

After deploying the OVA, creating an IP Pool, and enabling both SSH and Bash Shell on VCSA, it is time to configure the appliance.

  • SSH to the IP address you gave to the appliance using root as the user and demova as the password
  • Type shell to access Bash Shell
  • run the following command in Bash Shell
    • /etc/init.d/vsphere-client configure –start yes –user root –vc <FQDN or IP of vCenter> –ntp <FQDN or IP of NTP server>
  • If you need to change the default password for your root account, you can run the following command from bash shell
    • /usr/bin/chsh -s “/bin/bash” root
  • answer the question by answering YES
  • and enter the credentials for your vCenter


H5_deploy1

H5_deploy2


The HTML Web Client is pretty awesome, I gotta say, even if not all the features are there yet. It is super clean, and responsive. I can’t wait for it to be embedded with a full feature set.


H5_1

H5_2

Plan for vSphere core dump on diskless hosts

BootInstalling VMware vSphere on hardware come with many options when it comes to the location of the many partitions necessary for ESXi. ESXi can be installed on USB, SD (mini) cards, local storage, and boot from LUNs. Before you deploy your ESXi hosts, you should be thinking about your design and the limitations (is any) of each of the boot options.

Remember that ESXi has several partitions that are created during its installation.

7 Partitions:

  1. System Partition
  2. Linux Native – /scratch
  3. VMFS datastore
  4. n/a
  5. Linux Native /bootbank
  6. Linux Native /altbootbank
  7. vmkDiagnostics
  8. Linux Native /store

One thing to note is that partition 2 & 3 (/scratch & VMFS) are not present on the image below. This is because my ESXi host was installed on an SD card.

ESXi_Partitions


This post will focus on the vmkDiagnostics partition. VMware recommends that this partition is kept on local storage unless it is a diskless installation, such as boot from SAN. I have seen a rapid increase on boot from SAN as more and more people are transitioning into Cisco’s UCS blades. So, if you are doing this or planning on booting from SAN, make sure that you create a core dump partition for your hosts. You have a few options to do this.

  • You could have the core dumps on the boot LUN; however, it is recommended that a separate LUN is created for this partition.
    • Independent HW iSCSI only (keep reading).
  • If you set the diagnostic partition to be at the boot LUN, make sure only that host has access to it.
    • This should already be the case anyway. A boot LUN should only be accessible to the specific host.
  • IF you create a separate LUN for the diagnostic partition, you can share this LUN among many hosts.
  • You can also set up a file as a core dump location on a VMFS datastore (see caveat below).


That sounds pretty easy right?!? Yes but wait, there is a big caveat here. 

You CANNOT place the diagnostic partition on any of the options above if using software iSCSI or hardware dependent initiators (iBFT). This can only be done via independent hardware iSCSI. More info here. This is not version dependent at the time this post was written.


Now what?

If do not have any hardware HBAs, you have a couple of options.

  1. The recommended option is to set up ESXi Dump Collector
    • Requires configuration on vCenter (Windows and VCSA)
    • Available for vSphere 5.0 and later
    • Consolidates logs from many hosts
    • Easily deployed via Host Profiles or esxcli commands
  2. You could also put this on USB storage, but this requires disabling the USB Arbitrator service, which means that you will not be able to use USB passthrough on any VM.
    • I personally wouldn’t recommend this option.

Troubleshooting vSphere PSOD

VMware_PSOD The Screen of Death, as most of us know it as, is the result of a system crash. Windows has his famous Blue Screen of Death (BSOD), and VMware has a purple screen of death (PSOD). Of course there is also a Black Screen of Death, which is usually when Windows systems are missing a boot file or one or more of those files have become corrupted. Although there is a range of colors, the problem for many is How do I fix this? How do I know what caused this?

Many admins start with the obvious and simply reboot the machine hoping it was a hiccup, but chances are, there is a bigger problem going on that needs addressed. In VMware, just like other systems, a core dump file is created when the stop error is generated. This is where you start digging…

Where is my DUMP…file?!?

So, during the purple screen, the host is writing the dump file to a previously created partition called VMKcore. There is a chance that the core dump file won’t be written due to internal problems, so it is always a good idea to take a screen shot of the PSOD. Exporting the core dump file can be done via CLI, manually from vCenter path for both Windows and/or appliance, as well as vSphere Client and WebClient; which is the preferred method from most admin since it is so simple to do.

To export the logs from vSphere Web Client, use the following steps:

  • Open vSphere Web Client > Hosts & Clusters > Right click on vCenter > Export System Logs…

Sys_Logs

  • Choose the host that had the PSOD > Next

Sys_Logs_ESXi

  • Make sure you select CrashDumps, all others are optional

Sys_Logs_CrashDump


Once you have the dump file (vmkernel-zdump….), its time to look for the needle in the haystack. There are a lot of entries, and this file can be overwhelming to many people, but don’t stress, it is quite simple to find it. The first logical step is to find the crash entry point You can use the time when you noticed the PSOD or you can simply search within the log file for “@bluescreen”.

Find_@Bluescreen

Once you find this, you will see the exact cause for the PSOD. In the screenshot below, you can see that the error generated is in relation to E1000. You should automatically think vNIC/Drivers, as well as looking online for any VMware KB articles regarding the errors generated. In this case, there is a known issue for different versions of vSphere that have already been patched; so keeping up to date on patches is very important.

E1000_PSOD


The issue that triggered the PSOD in this environment was related to updates (fix) not being applied. The work around was to not use E1000e NIC on the VM but rather VMXNET3. Also, you HAVE to install the VMTools on your VMs. The VMTools have drivers needed for your VM to work properly. In this particular instance, VMTools were not installed on the VM. Once the tools were installed and the vNIC was switch to VMXNET3, the issue was resolved.


Refer to VMware’s KB2059053 for more info.

Deploying VVols on NTAP

VVolsEven before the release of vSphere 6, the hype for VVols has been in the upswing, and for a good reason. VVols allow for a granular management of VM objects within one or more datastores based on policies. I have written a few blogs about VVols, and also the requirements within NetApp here. I tend to write about the integration between the two vendors as I really like, and believe on their technology, and I am an advocate for both.

Anyway, deploying VVols on NetApp requires to first understand how this all works. So, with that in mind, don’t forget that this a software solution that relies on policies from both the VMware side and the NetApp side. As I explained on previous posts, deploying VVols on NetApp has certain requirements, but the one I’ll focus on is the VASA provider (VP). The VP acts as the translator between the VMware world and the storage array world, regardless of the storage vendor. Some storage vendors integrate the VP within the array others come as an OVA.

So, from the storage side, you first need to deploy the VP, and also in this case VSC, which is NetApp’s storage console within VMware. After all components have been installed, VASA will become your best friend as it will provision not only VVol datastores, but will also provision the volumes within NetApp, automatically create exports with proper permissions, and create the PE among others. The PE is a logical I/O proxy that the host sees and utilizes to talk to VVols on the storage side. In the case of an NFS (NAS) volume, the PE is nothing more than a mount point, in the case of iSCSI (SAN), the PE is a lun. Again, the VASA provider will automatically create the PE for you when you provision a VVol datastore.

Let’s start the roll out. Assumptions here are that you have already deployed VSC 6.0, VASA 6.0, and currently have vSphere 6.0 or later. On the NetApp side it is assumed that you have at least ONTAP 8.2.1 or later, and that you have already created an SVM of the protocol of preference whether it is iSCSI, FCP/FCoE or NFS, up to you.

The first thing you should do if you have both NetApp and VMware, or FlexPod for that matter, is to make sure your VMware hosts have the recommended settings from NetApp. To do this, go to VSC within the VMware Web Client, click summary, and click on the settings that are not green. VSC will open a new window and allow you to deploy those settings to the hosts. You should do this regardless if you are deploying VVols or not.

VSC_settings


The next step is to create a Storage Capability Profile within VSC/VASA. Within the VSC, go to VASA Provider for cDOT, and select Storage Capability Profiles (SCP). Here you will create your own profile of how you would like to group your storage, based on a specific criteria. For example, if you want a criteria for high performance, you may select a specific storage protocol, SSD drives, dedupe options, replication options, etc. This is the criteria that VASA will use to create your storage volumes when deploying VVol datastores, and if you already created a volume, this is also the criteria that will be qualified as compliant for the desired VVol storage.

I created an SCP that required the protocol to be iSCSI and SAS drives, the rest was set to any. This will result in VVol creation on the SAS drives only, and under the SVM that has iSCSI protocol and LIFs configured. If there are no iSCSI SVMs this would not work. Pretty self explanatory, I hope.

SCP_iSCSI

Now that the SCP is created, we can provision a VVol Datastore. Right click on the cluster or host and select “VASA Provider for clustered Date ONTAP”, then Provision VVol datastore.

Provision_VVol

Start the wizard and type the name of the VVol datastore, and select the desired protocol. Select the SCP that you want to include within the VVol, the qualified SVM(s) will be available if it matches the SCP you selected. For example, if you selected the SCP/protocol that calls for iSCSI and you only have one iSCSI SVM, that will be the only one that you will have as an option, and the NFS or FCP/FCoE SVMs will not appear. If there is a qualified volume, you may select to use it, or you may select none to create a new. If creating a new vol, choose the name, SCP, and other options just like you would from NetApp’s System Manager. You will also have the capability to add/create more volumes to the VVol datastore. The last step is to select a default SCP the VMs will use if the do not have a VMware profile assigned to them.

VVol_Complete

This will cause VASA to talk to your NetApp array and create a volume based on the SCP specified, at the same time, VASA will create the PE, which in this case is a lun.  You can add/remove storage to the VVol datastore you created at a later time simply by right-clicking the VVol and go to the VASA settings. Below you can see the PE that the VP created within the volume that was created during the VVol deployment process.

VVol_PE


The next step is to create a VM Storage Policy that points to the SCP. Once this policy is attached to a VM, it will “tell” the VM which datastore it is supposed to be on. So if you have a SQL VM on a high performance policy, you know that as long as the VM is in compliance, it will run in the high performance profile you created.  To create the VM policy within the Web Client, click on VM Storage Policies, select new (scroll with green + sign), give it a name and select the vCenter. For the rule set, select the VP from the drop-down box for “Rules based on data services” and add a rule based on profile name. For the profile name option, select the SCP you created initially under VASA. This will show you what storage is compatible with this rule. Since I selected the iSCSI SCP, it will show me the iSCSI VVol I have already created. This creates the VM policy that you can assign to individual VMs.

VSP_Rule1

VVol_Complete


You can also have different storage policies for the Home folder and VMDK.

VM_Policy


VM_Storage_Policy


Pretty cool, right?!?

I hope this helps you get started with VVols.