
One of the pre-requisites for vSphere with Tanzu is the ability to provide a Load Balancer to the environment. THe options as of vSphere 7.0 U1 included NSX or HAProxy appliance. In vSphere 7.0 Update 2, a new option for load balancer is available for the deployment of Workload Management. The NSX Advanced Load Balancer (ALB) also known as AVI, is available for download in OVA format from my.vmware.com. Deploying ALB will allow for communication between users, service engines, load balancer type services with supervisor and TKG clusters.
Let’s jump into it. First download the OVA for NSX Advanced Load Balancer from my.vmware site.
Once the OVA has been downloaded, proceed to your vCenter and deploy the OVA by supplying a management IP address.
Supplying a sysadmin login authentication key is not required.

Once the appliance has been deployed and powered on, login to the UI using the supplied management IP/FQDN.
Create username and password. Email is optional.

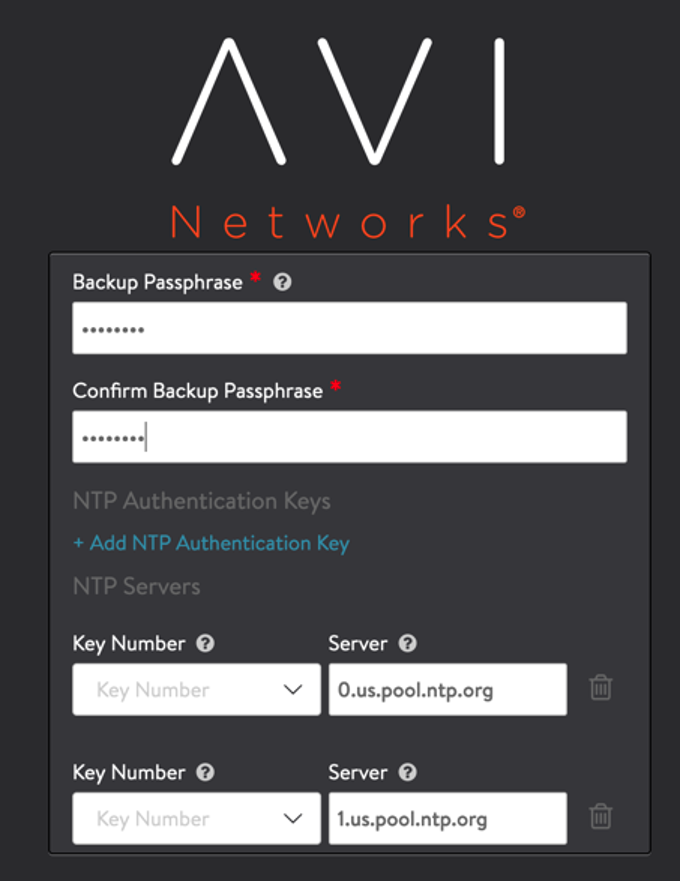
Add DNS , NTP, and backup passphrase information.
If you provided email address, you would also need to provide email settings.
You will also need to identify which Orchestrator Integration will be used. Select VMware vCenter/vSphere.

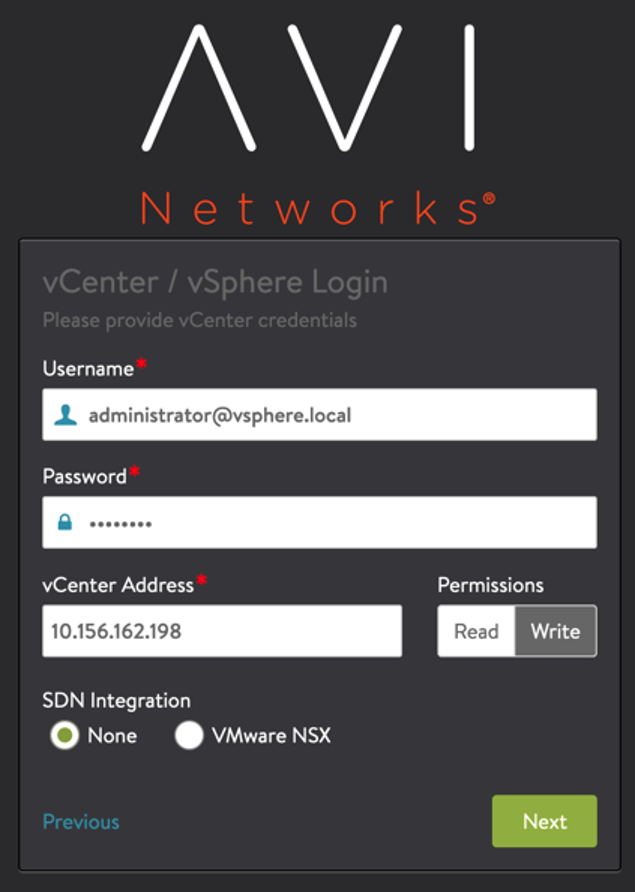
The appliance needs to know how to connect to your vCenter. Supply the username, password and vCenter information so that ALB can connect to vCenter. For permissions, you can leave “Write” selected, as this will allow for easier deployment and automation between ALB and vCenter. Leave SDN Integration set to “None”.
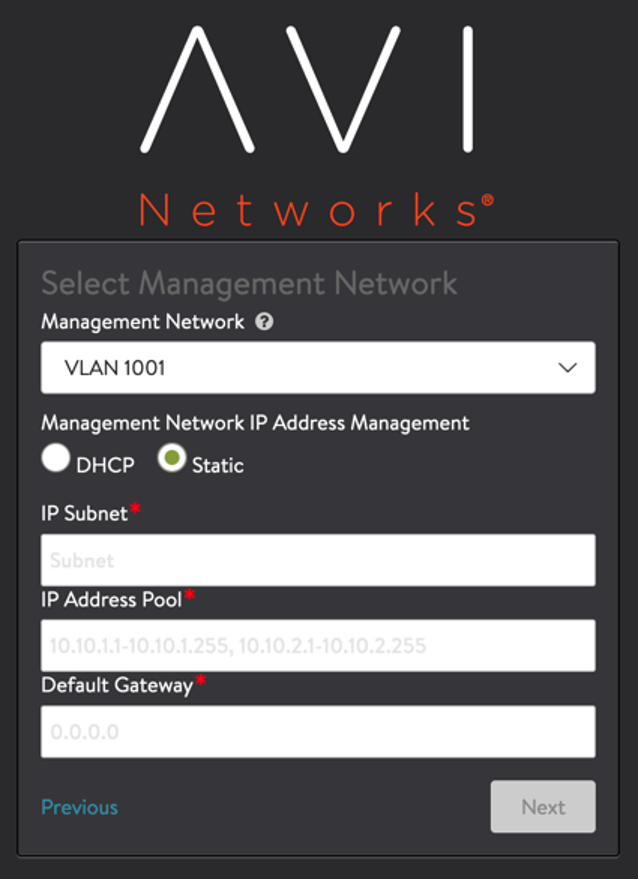
Select the Management PortGroup, IP subnet, gateway, and IP address pool to be utilized. This IP Pool is a range of IP to be used to connect the Service Engine (SE) VMs.
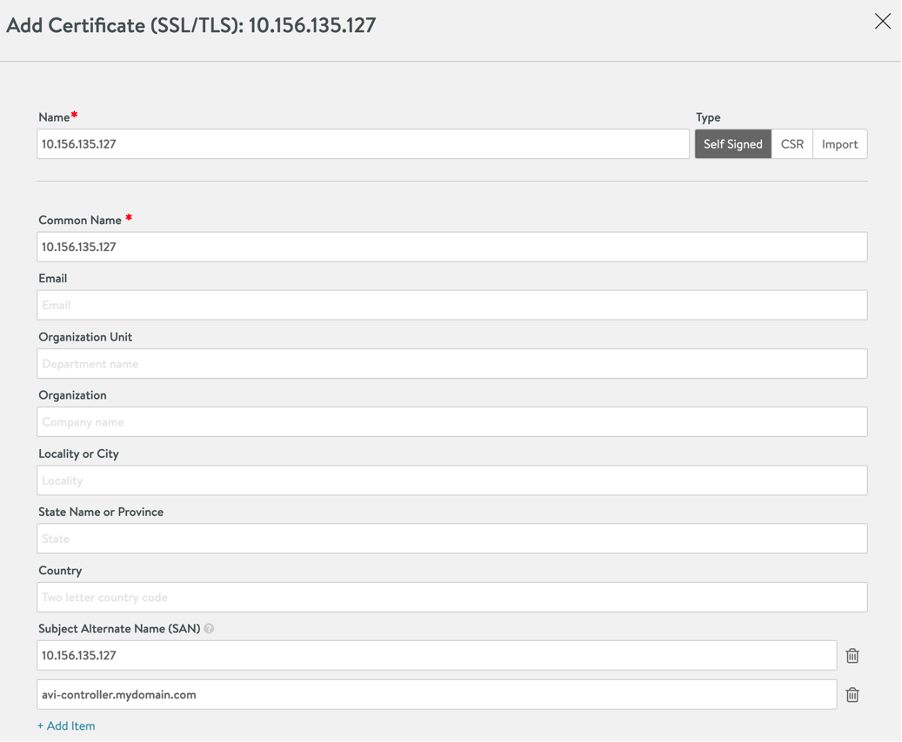
After the initial configuration, we will need to either import a certificate or create a self-signed certificate to be used in Supervisor cluster communication. For PoCs, creating a self-signed certificate is perfectly fine.
Log in to the appliance using the user/password combination specified during initial deployment.
Navigate to Administration by selecting this option from the drop-down menu on the upper left corner.

In the administration pane, select Settings.
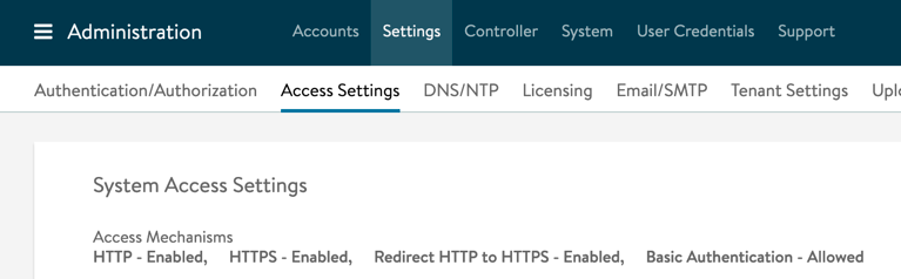
Click on the caret under SSL/TLS Certificate to expand the options. Click on “Create Certificate” green box.

Create a self-signed certificate by providing the required information. Make sure to add Subject Alternate Name(s).
The next step is to configure the data network. Change from the administration tab to Infrastructure by selecting the option from the drop-down menu on the upper left corner.
From the Infrastructure pane, click on Networks. ALB will talk to vCenter and retrieve available networks.
Ideally, you’ll want to create a separate PortGroup for your data network. In this example, this is the Frontend network. The Load Balancer VIPs will be assigned to Service Engines from this network. These VIPs are the interfaces that connect users to clusters and Kubernetes services.
Select the Port Group for the data network, specify an IP address, and add a static IP address pool to be used.

Because service engines (SE) don’t have interfaces on the workload network that Kubernetes cluster nodes are connected to, we need to specify a route. Note: VIPs are on a network accessible to the client, but the workload network may not be, so these routes enable traffic to get to the clusters.
To add a route, Navigate to Infrastructure > Routing > Create
In this example, the 10.156.128.0/20 is the Workload Network, and the next hop is the gateway for the VIP network.

Next, we need to create an IPAM Profile. This is needed to tell the controller to use the Frontend network to allocate VIPs via IPAM.
Navigate to Templates > Profiles > IPAM/DNS Profiles > create

Via IPAM profile, change the cloud for usable network to Default-Cloud, and set the usable network to the VIP network, in this case vDS-WCP-Frontend.

At this point your NSX Advanced Load Balancer Appliance is ready to be used during the configuration of Workload Management.
