VCF Cloud Builder: REUSE

When deploying VMware Cloud Foundation (VCF), we deploy an appliance (ova) called Cloud Builder. This appliance allow us to load the parameter file an automate the deployment of the entire infrastructure, allowing us to go from spreadsheet to full SDDC.

Cloud Builder also includes the VMware Imaging Appliance that you can leverage to build your ESXi hosts. Just navigate to https:// Cloud_Builder_VM_IP:8445/via and login with the admin credentials you set during Cloud Builder ova deployment. There are some documents out there stating to use root and EvoSddc!2016 as password but that most likely not work, at least not on newer versions available. More on VIA here.

Anyway, once the bringup of VCF has been completed, Cloud Builder will most likely not be used again, you can safely remove it. However, if you plan to deploy other VCF environments or, like me, is constantly deploying VCF on lab environments you can “refresh/reuse” Cloud Builder via a couple of options… See what I did there?!? via … like the imaging appliance.. never mind.

So the first option is to simply take a snapshot of Cloud Builder after the initial deployment of the ova and BEFORE you login to it and start importing the parameter file. Once you are done using Cloud Builder, you can simply revert the snapshot back and you can reuse the appliance again.

If you prefer not to take the snapshot or forgot to do it at the beginning, no worries. We can run a command within Cloud builder to remove previous entries and REUSE Cloud Builder.
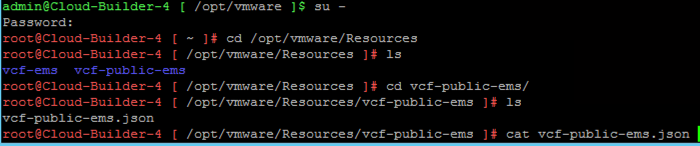
  • su –
  • psql –host=localhost -U postgres -d bringup
  • delete from execution;
  • delete from “Resource”;
  • \q

Disclaimer: this is most likely not officially supported and hacking at the db is done at your own risk. Since this is Cloud Builder the risk is low and you can always deploy a new appliance if you mess it up, but still be careful.

That’s it, this will remove the previous entries and next time you log in to Cloud Builder it will feel like you just deployed the appliance. Meaning that you have to go through the initial prompts, such as accepting the EULA, selecting the platform to be used, etc.

@GreatWhiteTec

VCF: Generate JSON File from Excel Spreadsheet

Performing VCF bring-up includes “feeding” Cloud Builder with all the information needed to deploy all the components automagically for you, including vCenter, vSAN, NSX, SDDC Manager and configuring all to actually work together. Sounds too good to be true, but it is… it is true indeed.

I personally like to use json files as it gives me an easier way to replace IPs, passwords, etc, as well as change size and a number of components. More on that later…

Once you deploy the Cloud Builder appliance, you can use the completed worksheet or you can use a json file. Cloud Builder provides a way to convert your Excel spreadsheet into a json file via a python script and also via SoS (Supportability and Serviceability) utility.

Python Option

There is an official document on this procedure, and probably a couple of blog posts out there; however, there was a recent move to Python3, so the syntax has changed a bit.

Here are the steps to generate the json file with python3:

  • Use a file transfer utility (WinSCP) to copy the Excel file to Cloud Builder.
    • Log in with Cloud Builder admin account
    • copy/past excel file from your computer to /home/admin

  • Copy the Excel file from /home/admin to /opt/vmware/sddc-support using sudo command to gain access to the destination, or switch to root (su)
    • sudo cp <file-name.xlsx> /opt/vmware/sddc-support
  • Change directory to /opt/vmware/sddc-support and verify the xlsx file was copied successfully

  • Then run the following command to generate the json file
    • sudo python3 -m cloud_admin_tools.JsonGenerator.JsonGenerator -t cloud_admin_tools/JsonGenerator/template -d vcf-public-ems -i <file-name-path.xlsx> 
    • you can use -h to see other flags available
    • you should see the json file being generated


  • Navigate to your output location or if you used the default, navigate to /opt/vmware/Resources/<design chosen (vcf-ems, vcf-public-ems)>
  • verify that you see the json file and you can then read it
  • cat vcf-public-ems.json
  • You may need to switch to root user to access the output directory.

  • You can also assign a output directory with the flag -o or –output
    • In this example I set the json file directory to be /home/admin/

  • You can now export the file and use it as the input file during Cloud Builder bring-up workflow

SoS Utility Option

Instead of using the python option, you can also leverage the SoS utility by executing the following on the Cloud Builder appliance:

  • SSH to Cloud Builder with admin account 
  • type su to switch to root, enter the root password
  • Switch to the following directory /opt/vmware/sddc-support
  • Run the following command
    • ./sos --jsongenerator --jsongenerator-input <path-to-parameter-file> --jsongenerator-design vcf-public-ems


    • example: 
      ./sos --jsongenerator --jsongenerator-input /home/admin/poclab-ems-deployment-parameter.xlsx --jsongenerator-design vcf-public-ems

SoS_JSON

  • If you already generated a json file prior to running this command it will ask you if you want to overwrite

overwrite_json

  • Once you run the SoS command, the json file will be located in /opt/vmware/sddc-support/cloud_admin_tools/Resources/vcf-public-ems

json_output


@GreatWhiteTec